Sometimes I get music albums in high-resolution formats (e.g., 384000 kHz / 32-bit or DSD), which can range from 2 to 5 gigabytes per album. To save disk space, I often reduce the sample rate and bit depth to something like 48 kHz / 16-bit, which typically results in files around 750–900 kbps. I know for a fact that I cannot hear the difference between 192 kHz / 32-bit and 48 kHz / 16-bit audio. Or if it's my super favourite album, and I've got it in DSD512 or DSD256, I may convert it to 24/96 kHz (even though, again, I'm sure I won't hear a difference with 48 kHz /16 bit, but just for my peace of mind...).
In fact, even though I consider myself an audiophile and have audio equipment worth thousands of dollars, I can't reliably distinguish between 192 kbps MP3 and FLAC in double-blind tests. I verified this using
Foobar's ABX comparator plugin.
Another possible reason for this conversion to FLAC tracks is to get the album in a better format - FLAC tracks. It may be more convenient to have tracks as separate files. Also, most players can play FLAC, and you may have trouble playing DSD.
Here’s how you can reduce the sample rate and bit depth of FLAC audio files using
Foobar:
1) If you don’t already have the FLAC encoder, you can download it from: https://xiph.org/flac/download.html
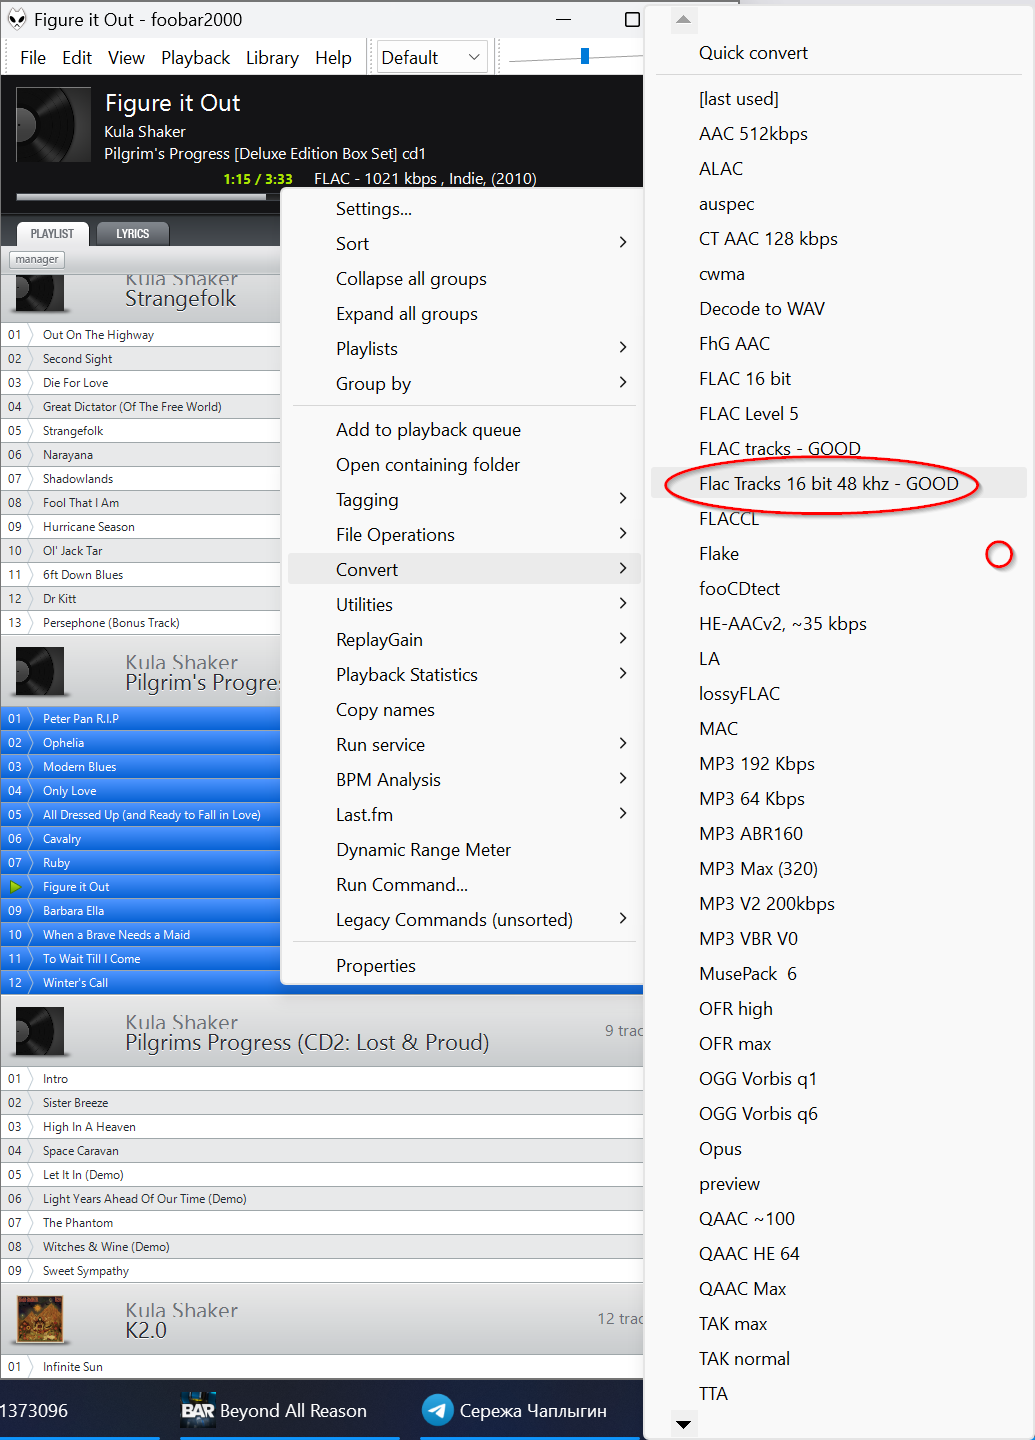
2) In FooBar's playlist, right-click on the flac file you want to convert and navigate to Convert -> [...] :
3) In th
e Converter Setup window, locate an existing FLAC preset and double-click it.
4) Configure the Output Format
-
Click Output Format, then Edit.
-
Specify the path to the FLAC encoder you downloaded earlier.
-
Adjust the settings to reduce the bit depth to 16-bit. Use the screenshot below as a reference:
"-8" here specifies the compression level (8 is maxium). The flac encoder is pretty fast, so even the maximum compression is fast.
Press OK and then Back.
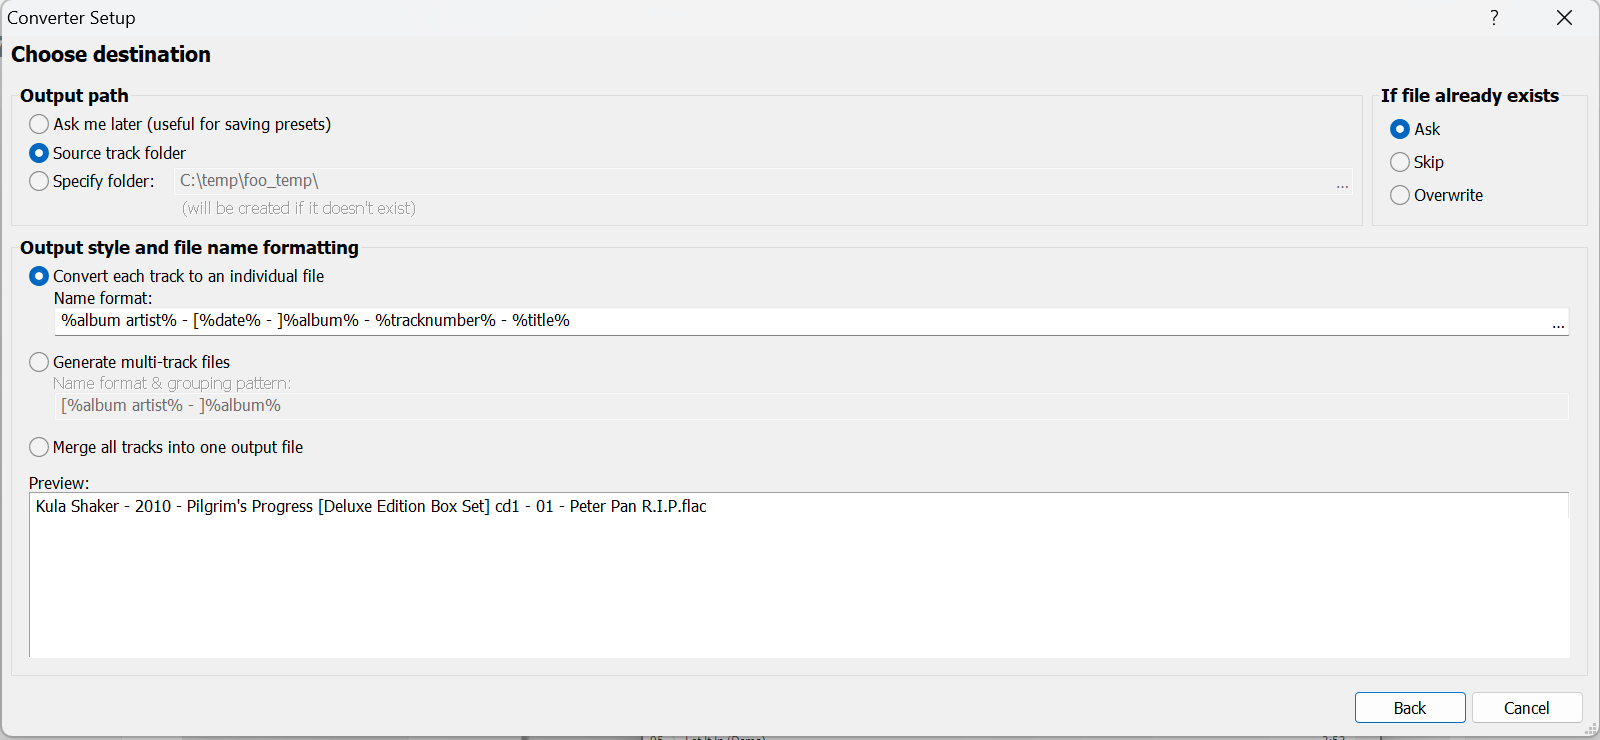
5) Choose your desired destination for the converted files. I prefer saving tracks as separate files with a specific naming pattern. Set this up as you like.
6) Enable DSPs (Digital Signal Processors):
Click Processing. You’ll need two DSPs:
a) Resampler (dBpoweramp/SSRC): This is often included with Foobar2000 by default. If you don’t have it, you can use
another one.
7) Double-click these DSPs in the Available DSPs list to move them to the Active DSPs list.
8) Click [...] next to the Resampler and specify the desired sample rate (e.g., 48 kHz):
9) The default Smart Dither settings should work fine.
10) Click Other. I personally like to enable replay gain after conversion and ensure that metadata and album artwork are copied during the process.
11) Click Back, then Save. Optionally, rename the preset to something meaningful for future use.
12) Now, let's try it! Select the desired tracks to convert, right-click, go to Convert, and choose the preset you just created.
13) After the conversion is complete, right-click the newly converted file(s) and select Open Containing Folder (if you set the output directory to be the same as the source):
14) Add the converted files to the playlist, right-click any of them, and select Properties:
Verify that the files have the correct sample rate and bit depth (e.g., 48 kHz / 16-bit) as well as a lower bitrate than the original.
15) Congratulations! You’ve successfully saved a few gigabytes of disk or SD card space. 😊
16) And in case 48 KHz & 16 bits is too poor for you, you can easily create a converter with 192 KHz 24 bit output. Just set the max bit rate to 24 bits here:
And set the 192 KHz sample rate in your resampler:


Comments
Post a Comment